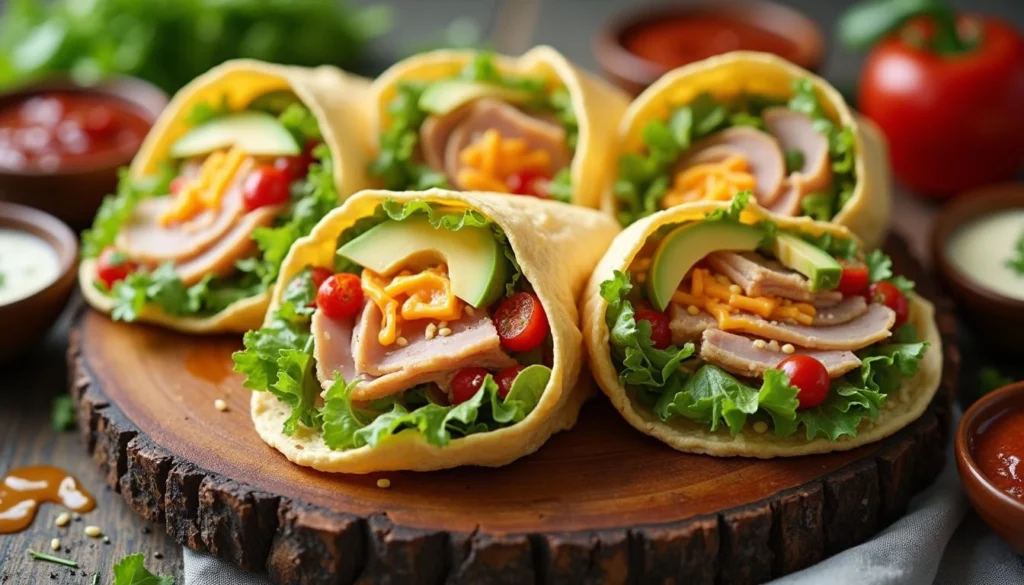
Homemade Cheese Wraps

In the world of wraps and tortillas, cheese wraps are a game-changer. Whether you’re following a keto diet, seeking gluten-free options, or simply love cheese, these wraps offer a delicious and versatile alternative. Gone are the days of relying solely on flour-based tortillas; cheese wraps bring a whole new level of flavor and functionality to your meals.
Cheese wraps are incredibly simple to use and customize, making them perfect for busy weekdays or creative weekend cooking experiments. For another creative recipe, try this Pumpkin Pancake Mix Recipe for a sweet breakfast option. In this guide, you’ll discover what cheese wraps are, their benefits, and how to make them at home. We’ll also explore creative recipes, store-bought options, and common mistakes to avoid. Ready to revolutionize your wrap game? Let’s dive in!
1. What Are Cheese Wraps?
Definition
Cheese wraps are exactly what they sound like—wraps made entirely or partially from cheese. They serve as a flavorful, low-carb alternative to traditional tortillas or flatbreads. These wraps are perfect for sandwiches, tacos, or even quick snacks.
Key Features
- Gluten-Free: Naturally free of gluten, cheese wraps are ideal for those with dietary restrictions.
- Low-Carb: A popular choice for keto enthusiasts.
- Versatile: Suitable for a wide variety of recipes, from savory to sweet.
Popularity in Diet Trends
Cheese wraps have gained traction among followers of keto, paleo, and gluten-free diets. They’re a creative way to satisfy cravings for wraps without straying from dietary goals. For those exploring keto-friendly sweets, check out Is Vegan Chocolate Good for Keto?.
Types of Cheese Wraps
- Pre-Made Options: Available in stores under brands like Cheese Folios and Trader Joe’s.
- Homemade Wraps: Easy to prepare using basic kitchen tools and your favorite cheese varieties.
2. Benefits of Cheese Wraps
Nutritional Benefits
- Protein-Packed: Cheese is naturally high in protein, making these wraps a filling option for meals or snacks.
- Healthy Fats: Ideal for those following high-fat, low-carb diets like keto.
- Low-Carb: With virtually no carbohydrates, cheese wraps are a perfect substitute for traditional tortillas.
Convenience
- Easy to Make: Whether homemade or store-bought, cheese wraps are simple to prepare.
- On-the-Go Friendly: Pre-made wraps are a great option for quick lunches or snacks.
Versatility
- Use them as a base for sandwiches, tacos, burritos, or even sweet wraps. For inspiration on complementary meals, see Chicken Fries for a tasty side.
- Pair them with a variety of fillings to suit your taste and dietary needs.
3. Types of Cheeses Suitable for Wraps
Best Cheeses for Melting Wraps
- Mozzarella: Soft and stretchy, perfect for pliable wraps.
- Cheddar: Offers a sharp flavor and works well for tacos.
- Provolone: Milder in taste, with excellent melting properties.
Firm Cheeses for Pre-Made Wraps
- Swiss: Known for its distinctive flavor and firm texture.
- Parmesan: Crispy and flavorful, ideal for sturdy wraps.
- Gouda: Slightly sweet and versatile for various fillings.
Dairy-Free Options
- Vegan Cheese Alternatives: Brands like Violife and Daiya offer meltable, dairy-free options that work well as wraps.
How to Choose the Right Cheese
- Flavor Profile: Pick a cheese that complements your chosen fillings.
- Melting Point: Softer cheeses work better for flexible wraps, while firmer cheeses hold their shape.
- Dietary Preferences: Consider vegan or lactose-free options if needed.
4. How to Make Cheese Wraps at Home
Ingredients Needed
- Shredded or sliced cheese of your choice.
- Parchment paper or silicone baking mats.
Step-by-Step Instructions
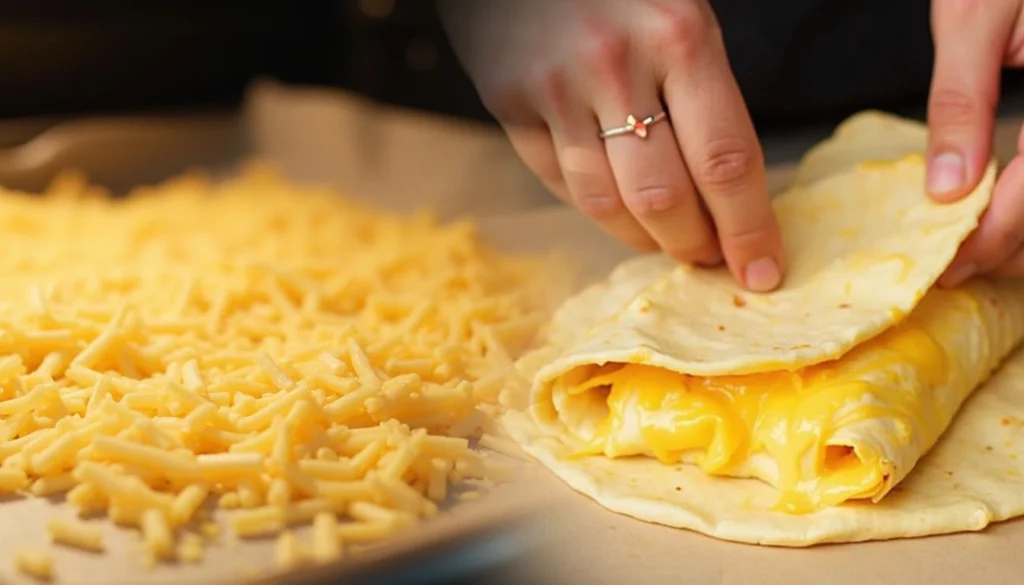
- Prepare the Cheese: Lay shredded cheese in a circular shape or use pre-sliced cheese on a parchment-lined baking sheet. If you’re including chicken fillings, learn How Long to Cook Chicken on Stove for perfectly cooked protein.
- Melt the Cheese: Bake in a preheated oven at 375°F for 5-7 minutes, or until the cheese melts and edges start to crisp.
- Shape the Wrap: While the cheese is still warm, carefully lift it off the parchment paper and drape it over a rolling pin or bowl to shape.
- Cool and Store: Let the wraps cool completely before filling or storing.

Pro Tips for Perfect Wraps
- Prevent Sticking: Always use parchment paper or a silicone mat to avoid sticking.
- Thickness Matters: Spread the cheese evenly to ensure consistent texture and pliability.
- Work Quickly: Shape the wraps while they’re warm to prevent cracking.
5. Creative Cheese Wrap Recipes
Basic Cheese Wrap with Deli Meat
- Ingredients: Cheddar cheese, turkey slices, lettuce, and mustard.
- Directions: Melt the cheese, let it cool slightly, then layer with turkey and lettuce before rolling.

Breakfast Cheese Wrap
- Ingredients: Scrambled eggs, crispy bacon, avocado, and cheddar.
- Directions: Wrap the ingredients in a melted cheese wrap for a hearty breakfast.
Vegan Cheese Wrap
- Ingredients: Vegan cheese, grilled veggies, and hummus.
- Directions: Use vegan cheese alternatives and fill with your favorite plant-based toppings.
Low-Carb Taco Wraps
- Ingredients: Ground beef, salsa, sour cream, and Monterey Jack cheese.
- Directions: Use melted Monterey Jack cheese as the base for your tacos.
Sweet Cheese Wraps
- Ingredients: Cream cheese, fresh berries, and a drizzle of honey.
- Directions: Combine the ingredients in a melted wrap for a sweet treat.
6. Store-Bought Cheese Wraps: A Guide
Popular Brands
- Cheese Folios: Widely available and come in various flavors. Pair them with these High Protein Pumpkin Muffins for a balanced and filling meal.
- Trader Joe’s Cheese Wraps: Affordable and high-quality.
Comparison of Options
- Ingredients: Look for minimal additives.
- Price: Compare costs to decide what fits your budget.
- Flavor: Test different brands to find your favorite.
When to Choose Pre-Made Over Homemade
- Pre-made wraps save time and effort, making them ideal for busy schedules.
- Homemade wraps offer more customization and freshness.
7. Common Mistakes When Making Cheese Wraps
Cheese wraps are simple to make, but even the smallest errors can lead to disappointing results. Understanding these common pitfalls can help you achieve perfect, pliable wraps every time. Here’s a detailed look at mistakes to avoid and tips for ensuring success:
1. Overmelting the Cheese
Overheating the cheese can cause it to become too greasy and fragile, making it difficult to shape or use as a wrap.
How to Avoid It: Keep an eye on your cheese as it melts. Once the edges start to crisp slightly and the center is fully melted, it’s time to remove it from the heat. Using an oven timer can help ensure precise melting.
2. Not Shaping Quickly Enough
Cheese hardens as it cools, and if you don’t shape it while it’s still warm, it can crack or break.
How to Avoid It: Have your tools ready—such as a rolling pin or bowl—before you start melting the cheese. Work swiftly but carefully to shape the wrap immediately after removing it from the heat.
3. Skipping Non-Stick Liners
Using the wrong surface can lead to sticking, making it nearly impossible to remove the cheese without tearing.
How to Avoid It: Always use parchment paper or a silicone baking mat. These non-stick liners ensure your cheese lifts off cleanly.
4. Using Unsuitable Cheeses
Not all cheeses melt well or hold their shape once cooled. Choosing the wrong cheese can result in wraps that fall apart.
How to Avoid It: Stick to cheeses with good melting properties, like mozzarella, cheddar, or provolone. Avoid crumbly cheeses or those with high moisture content.
5. Making the Wraps Too Thin or Thick
If your cheese layer is too thin, the wrap may tear easily. Too thick, and it can be overly dense and hard to fold.
How to Avoid It: Spread the cheese evenly and aim for a consistent thickness. Experiment with small batches to find the perfect balance.
By keeping these tips in mind and avoiding common mistakes, you can create cheese wraps that are both functional and delicious. With a little practice, you’ll master the art of crafting these low-carb, gluten-free delights.
- Overmelting Cheese: This makes the wrap too greasy and fragile.
- Not Shaping Quickly Enough: Cheese hardens as it cools, making it harder to shape.
- Skipping Non-Stick Liners: Always use parchment paper or silicone mats to avoid sticking.
- Using the Wrong Cheese: Not all cheeses melt well; choose one suitable for wraps.
8. Storing and Reheating Cheese Wraps
Proper storage and reheating are essential for maintaining the flavor, texture, and usability of cheese wraps. Whether you’re meal-prepping for the week or saving leftovers, following these tips will help you enjoy your wraps to the fullest.
Storage Tips
Cheese wraps can last for several days if stored correctly. Improper storage, however, can lead to sogginess or loss of flavor.
- Refrigeration: Place cheese wraps in an airtight container or seal them in a plastic storage bag. Store them in the refrigerator for up to 5 days.
- Freezing: If you plan to keep them longer, freeze individual wraps by placing them flat on a baking sheet. Once frozen, transfer them to a freezer-safe bag. Cheese wraps can be stored in the freezer for up to one month.
- Avoid Overcrowding: Layer parchment paper between wraps to prevent sticking.
Reheating Options
Reheating cheese wraps correctly is crucial for preserving their texture. Overheating can make them greasy, while underheating might leave them too firm.
- Skillet: Place the wrap in a non-stick skillet over low to medium heat. Heat for 1-2 minutes on each side until warm and pliable. This method retains crisp edges and prevents sogginess.
- Microwave: Use a microwave-safe plate and heat the wrap for 10-15 seconds. This method is quick but can soften the wrap more than other methods.
- Oven: Preheat the oven to 350°F. Lay the wraps flat on a baking sheet and heat for 3-5 minutes. This works best for larger batches or frozen wraps.
Maintaining Texture and Flavor
- Don’t Overheat: Excessive heat can cause the cheese to become greasy or lose its structure.
- Reheat Gradually: Warming the wraps slowly ensures even heating and preserves their pliability.
- Use Fresh Ingredients: When reheating filled wraps, ensure the fillings, such as vegetables or meats, remain fresh to complement the cheese.
By storing and reheating your cheese wraps properly, you can enjoy them just as much the second time around. These simple techniques ensure that every bite is as delicious and satisfying as the first.
Storage Tips
- Refrigerate in an airtight container for up to 5 days.
- Freeze wraps individually on a baking sheet, then transfer to a freezer bag for longer storage.
Reheating Options
- Skillet: Heat over low to medium heat for a crispy texture.
- Microwave: Warm for 10-15 seconds for a softer wrap.
- Oven: Reheat at 350°F for a few minutes for even warming.
Maintaining Texture and Flavor
- Avoid overheating, which can make the cheese greasy.
- Reheat gently to preserve the wrap’s structure and taste.
9. FAQs about Cheese Wraps
What type of cheese is good for wraps?
Cheeses like mozzarella, cheddar, provolone, and Swiss are ideal for wraps due to their melting properties and pliability. For firmer wraps, Parmesan and Gouda are excellent choices.
What are cheese wraps called?
Cheese wraps are often referred to as “cheese folios” or “cheese tortillas,” especially in commercial products. They’re also simply called “cheese wraps” in recipes and menus.
What is the best wrap for cheese?
The best wraps for cheese are parchment paper or silicone mats when melting and shaping at home. For store-bought options, Cheese Folios and similar brands work perfectly.
What is a cheese wrapper made of?
Cheese wrappers are typically made from parchment paper or plastic to protect the cheese from moisture loss while allowing it to breathe.
What is the Babybel cheese wrapper made of?
The Babybel cheese wrapper is made of wax, which helps preserve the cheese by sealing it from air and moisture.
What is a substitute for cheese paper?
If you don’t have cheese paper, you can use parchment paper or wax paper wrapped loosely to allow airflow while preventing the cheese from drying out. Store in an airtight container in the fridge or freeze for longer shelf life.
Conclusion
Cheese wraps are a versatile, delicious, and low-carb alternative to traditional tortillas. Whether you’re making them at home or buying pre-made options, they offer endless possibilities for creative meals. From savory tacos to sweet treats, cheese wraps cater to every palate and dietary need. Try experimenting with different cheeses and fillings, and let your culinary creativity shine. Ready to start? Whip up your first batch of cheese wraps today and elevate your meal game!


4 Comments